Power Surge Killed Your Console? Here’s What to Check First
Table Of Contents
Share:
It’s every gamer’s nightmare: one moment you’re battling bosses or racing through virtual worlds, and the next — boom— a power flicker or surge leaves your gaming console completely unresponsive. If a recent power surge or outage has seemingly killed your console, take a deep breath. We know how frustrating and panic-inducing this can be. The good news is, there are some clear steps you can take to regain control of the situation. In this guide, we’ll walk you through exactly what to do first when a power surge strikes your Xbox, PlayStation, or Nintendo console. You’ll learn how to check for common issues, understand what might have happened internally (from blown capacitors to fried power circuitry), and figure out when it’s time to call in the pros.
Whether your PlayStation won’t turn on after a power outage or you’re desperately searching how to fix an Xbox after a surge, this post is for you. Let’s get your gaming setup back on track!
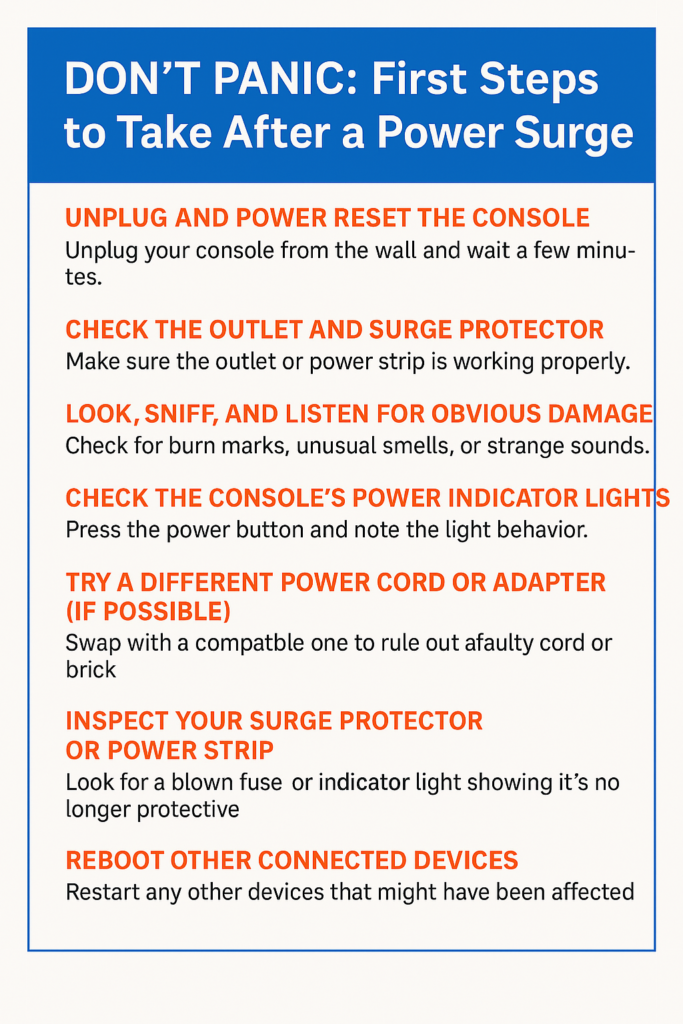
Don’t Panic: First Steps to Take After a Power Surge
When your console won’t turn on after a surge, it’s easy to fear the worst. But don’t hit the panic button just yet. Start with this simple checklist to rule out obvious fixes. Often, what looks like a dead console can be something external or easily replaceable. Go through these steps to cover the basics before considering any major repairs:
Unplug and Power Reset the Console: First, safety comes first – unplug your console from the wall immediately. This protects you and your device from any lingering electrical issues. Leave it unplugged for a few minutes. (Some power adapters have internal reset mechanisms that kick in after being disconnected for a short time.) This “power reset” can sometimes clear a fault. After a couple of minutes, plug the console back in and try turning it on again. You’d be surprised – in some cases the console might spring back to life if the surge protector inside just needed a reset.
Check the Outlet and Surge Protector: Before blaming the console, make sure the wall outlet or power strip is actually delivering power. Plug in a lamp or charger to confirm the outlet works. If you were using a surge protector or power strip, inspect it. Many surge protectors have a small reset button or circuit breaker – if it tripped during the surge, it might have cut power to protect your devices. Reset the surge protector (or replace it if it’s dead). Also, check if the surge protector has an indicator light showing it’s still functioning. Sometimes the protector sacrifices itself during a big surge to save your console. Pro tip: Try plugging the console directly into a known-good wall outlet (bypassing any power strip) to rule out a faulty strip.
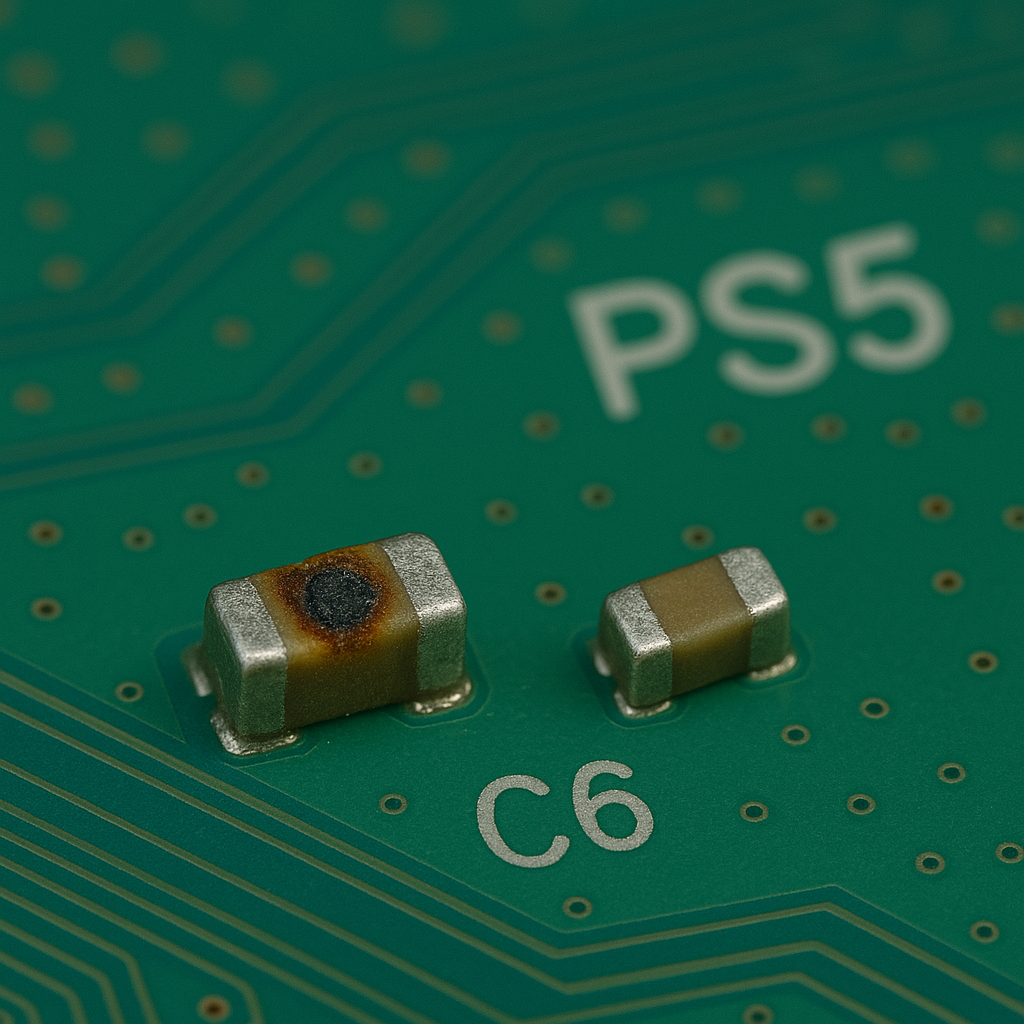
Look, Sniff, and Listen for Obvious Damage: Use your senses. Look at your console’s exterior and the power cable. Do you see any burn marks around the power port or on the plug? Sniff for any burnt electronics smell near the vents or power supply area – a sharp acrid odor could mean something inside got singed. Listen for any unusual sounds when you attempt to power it on (like a pop, crackle, or faint whine). If you did hear a loud pop or saw a spark at the moment of the surge, that’s a clue a component might have blown. Any visible smoke or charred plastic is a telltale sign the surge caused physical damage. (Image: A close-up of a blown capacitor on a console’s circuit board, showing a bulging top and possible burn marks.)
Check the Console’s Power Indicator Lights: Different consoles behave differently when there’s a power fault. Try pressing the power button and watch closely. No lights at all usually means no power is getting through. In some cases, you might see a brief flash of a power light or it might blink and then shut off. For example, some Xbox consoles have been known to momentarily light up and then immediately power off when there’s a short or surge-damaged component. A blinking red or yellow light (as seen in certain older consoles during faults) or a consistently blinking power LED could indicate an internal error state. Make note of any light behavior – it’s useful information for later diagnostic steps or for a technician if you seek help. If absolutely nothing lights up or happens, the console is truly getting zero power – which could point to a blown fuse or power supply failure (more on that soon).
Try a Different Power Cord or Adapter (If Possible): Sometimes the weakest link during a surge is the power cord or power brick rather than the console itself. If your system uses an external power supply (power brick) – like many older Xbox models or the Nintendo Wii U – check that boxy adapter. Is its status light on? (For instance, Xbox power bricks have an LED that’s orange on standby or green when powering the console. If it’s off or flickering, the brick may be toast.) If you have access to a spare compatible power brick or AC cord, swap it outand see if your console powers on. Be sure to use the correct type – only try this if you have the exact match for your console model. Using the wrong adapter can cause more damage. If a different cord/brick brings your console back to life, then you’ve identified the culprit: you’ll just need a new power supply cord or unit, which is a relatively easy fix.
Inspect Your Surge Protector or Power Strip: If your console was plugged into a surge protector, it’s worth inspecting that device closely. Some high-quality surge protectors have replaceable fuses or indicator lights that show if they’ve been blown. If yours has a light labeled “Protected” and it’s now off (when it used to be on), the surge protector may have absorbed a surge and sacrificed its protective component (like a MOV – Metal Oxide Varistor) to save your console. In that case, the console might be fine, but the surge protector won’t provide protection until it’s replaced. Conversely, if the surge protector didn’t do its job, the damage might have passed through to the console. Either way, don’t keep retrying the same protector if you suspect it’s fried – you’re better off removing it from the equation while troubleshooting.
Reboot Other Connected Devices: This isn’t directly about your console’s health, but if other devices were on the same circuit during the surge (TV, PC, etc.), check those too. If multiple devices are not working, it could indicate a larger electrical issue in your home (like a tripped circuit breaker) rather than the console itself. If only the console is down while others are fine, that points back to an issue specific to the console or its power supply.
Go through each item on this checklist. With a bit of luck, you might find that the console itself is okay and only a minor component (like the power cord or the surge protector) was the casualty. But if you’ve tried all of the above and your gaming machine is still dead in the water, it’s time to consider that the surge may have damaged something inside the console. In that case, it helps to understand what might have happened under the hood.
(Image: A gamer using a multimeter to test a console’s power supply output – an example of checking whether the power source is delivering the correct voltage.)
What a Power Surge Can Damage Inside Your Console (Blown Capacitors, MOSFETs, etc.)
Power surges are like electrical tsunamis: a sudden spike of voltage overwhelms the delicate components inside electronics. Your console’s internal components are engineered to operate at specific voltages, and a big surge is way more than they can handle. If the surge made it past your external defenses, it can wreak havoc on the console’s power circuitry. Here are the usual suspects when it comes to internal points of failure caused by power surges:
Blown Capacitors: Capacitors are little cylindrical components (or tiny flat ones, depending on type) that store and smooth out power for your console’s circuits. They’re crucial for stable voltage. A severe surge can overload capacitors, causing them to blow out or bulge. Visually, a bad capacitor might have a dome-shaped top (it should be flat) or even be leaking brownish electrolyte. In some cases, you might find one that exploded, leaving a mess or a burnt spot on the board. A blown capacitor can lead to no power or weird symptoms (since the power can’t stabilize). If you’ve ever heard of “bad caps” in electronics, surges are one way they go bad in a hurry. (Image: A burnt, bulging capacitor on a console motherboard – a clear sign of surge damage.)
Fried MOSFETs (Power Transistors): MOSFETs are metal-oxide-semiconductor field-effect transistors – yeah, that’s a mouthful! In simpler terms, they’re like electronic switches/regulators on the motherboard that help control power flow to various parts of the console. They often sit in the power regulation section of the board. A power surge can punch through a MOSFET and short it out or fry it. When a MOSFET fails, it can either stop power from flowing or, worse, create a short-circuit path. In a typical surge scenario, a MOSFET might short internally, which often blows a fuse or triggers some protective shutdown (so the console won’t stay on). There might not be any obvious visual damage – sometimes they char or crack, but not always. However, the result is the same: a console that won’t power on properly. If your console tries to turn on then immediately off, a shorted power transistor (MOSFET) could be the reason.
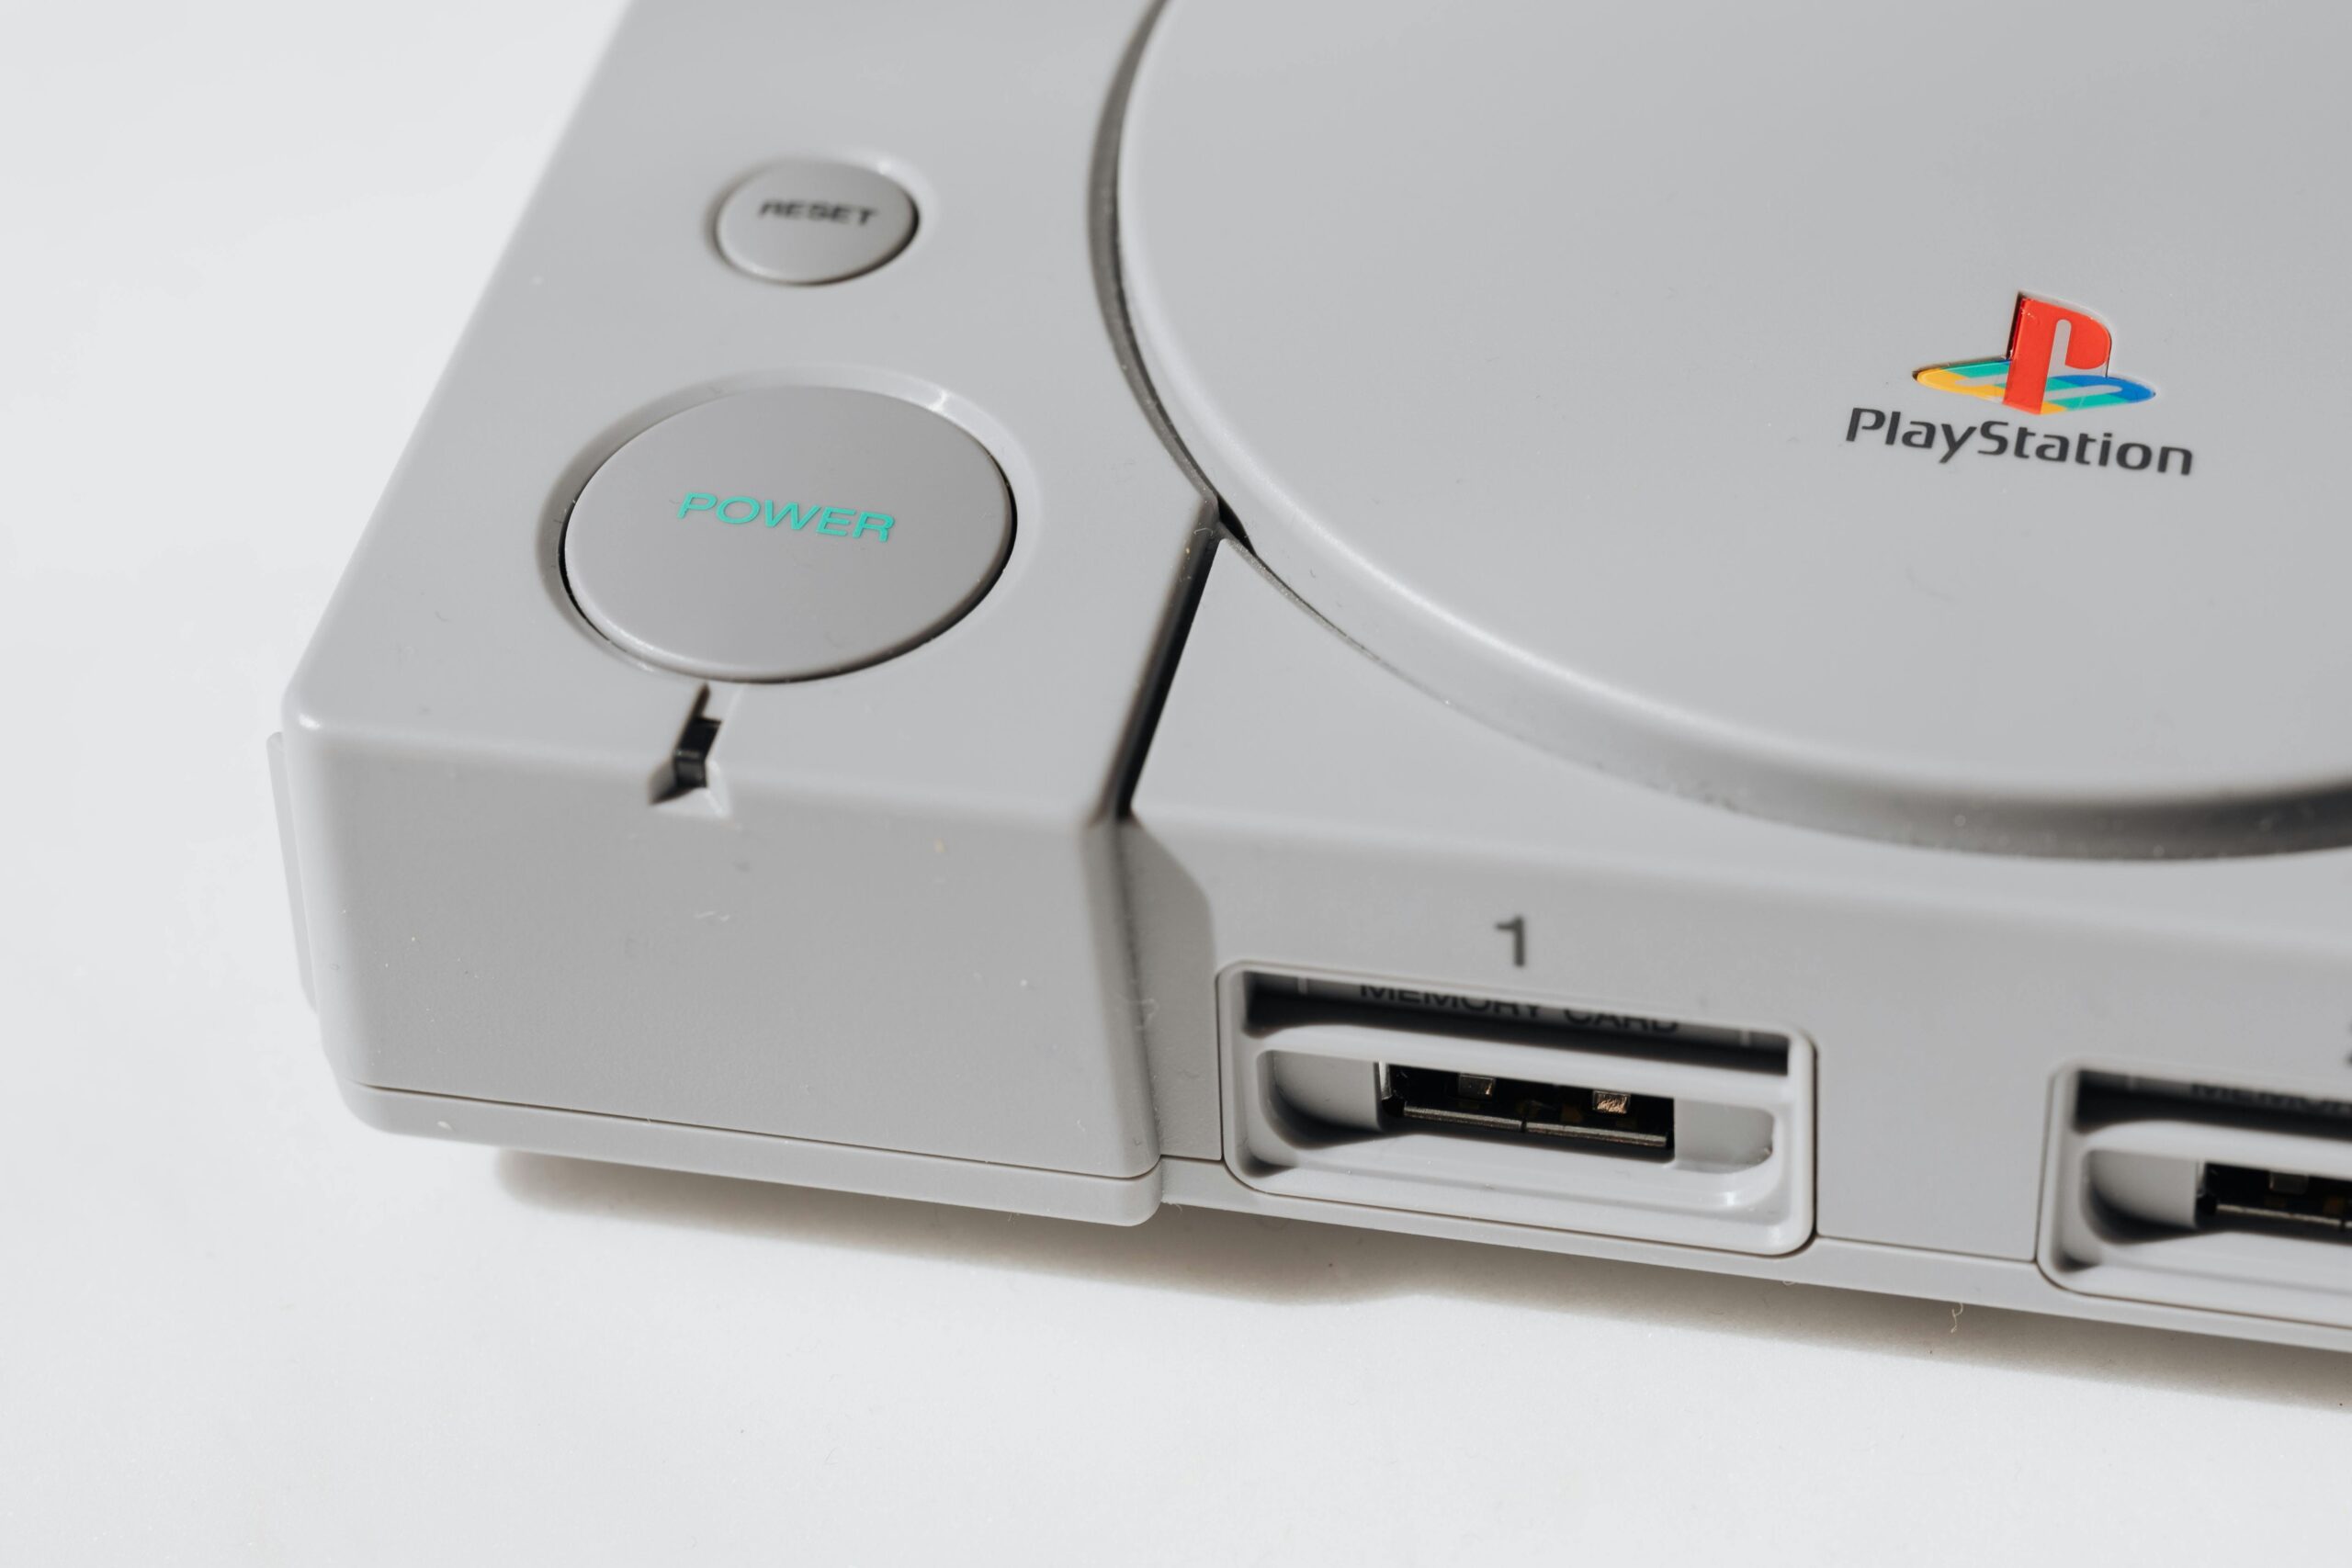
Damaged Power Management ICs: Modern consoles have integrated circuits (chips) dedicated to power management. These ICs coordinate the various voltage rails, battery charging (for portables), and make sure each component (CPU, GPU, drives, etc.) gets the correct power it needs. They’re basically the brains of the power delivery system. A surge can overload these chips or their tiny associated components. For instance, the PS5 has power management chips on its motherboard, and the Nintendo Switch is known for a particular power management IC that can fail and cause no-power issues. When a power management IC is damaged, the console might be completely unresponsive because the very system that tells it to turn on isn’t working. These chips are tiny and have many pins – not something you’d notice by a casual look, but they can definitively be knocked out by a voltage spike.
Internal Fuses and Voltage Regulators: Many consoles (especially older ones like the PS2, PS3, or retro consoles) include small fuses on the motherboard or in the power supply. These are designed as a last line of defense – they’ll “blow” (break the circuit) when too much current flows, to protect more expensive parts downstream. If a surge was strong, an internal fuse might have blown. The console then gets no power at all, effectively “dead”, but the good news is that a fuse doing its job might have saved the rest of the console from harm. Replacing a fuse is usually a lot easier than replacing a whole board (though it still may require soldering). Alongside fuses, there are voltage regulator circuits and components (like driver ICs and inductors). A surge can burn out these parts, leading to the system not getting the right voltage. For example, a regulator that should provide 5V might have failed, so some subsystem won’t start and the console appears dead.
Burnt PCB Traces or Connectors: In extreme cases, a power surge can literally burn through the printed circuit board traces (the thin copper lines that connect components) or damage connectors. This is more rare but can happen especially if a lightning strike or a major surge hit the system. You might see a charred line or a spot on the board if this occurred. Similarly, the power input jack or solder joints could be scorched.
In short, a surge can cause a chain reaction of failures inside a console. Often the initial component (like a MOV surge suppressor or fuse) takes the hit, but if the surge is too great or those protections aren’t present, it moves on to capacitors, transistors, and chips. The end result for the user is the same: press power, and nothing happens. No boot, no lights (or maybe a brief blink), no fan spin – basically a bricked console.
Now, understanding these possibilities doesn’t mean you should start replacing capacitors and MOSFETs yourself (unless you’re experienced, which we’ll discuss next). The key takeaway is that surge damage usually centers on the power supply and power regulation parts of your console. This is why a console that won’t turn on after a surge likely has an issue in its power delivery circuit. Unfortunately, these aren’t the sort of issues that a simple reboot or software fix can solve – it’s hardware-level damage.
DIY vs. Professional Repair: Know Your Limits with Console Power Issues
At this point, you might be thinking: “Okay, so maybe something inside is fried. Can I fix this myself?” This is where we need to have a frank chat. While some of the earlier steps (like swapping a power cord or resetting a breaker) are totally doable for anyone, going further into motherboard-level diagnostics is a whole different ball game.
For Advanced Tinkerers: If you’re one of those advanced users comfortable with electronics, you might grab a multimeter and start probing inside your console. You could open the console (voiding any warranty, mind you) and look for those obvious culprits we mentioned: check fuses for continuity, inspect the capacitors for bulging, maybe even test MOSFETs for shorts. If you have the right tools — say a multimeter, soldering equipment, maybe an oscilloscope — and you know how to identify components, you might be able to pinpoint the failure. For example, an experienced person could find a blown fuse on the board and replace it, or spot a burnt MOSFET and solder on a new one. There are countless electronics repair videos out there of skilled hobbyists doing just that.
However, be honest with yourself about your skill level. Most gamers, even serious ones, aren’t equipped for micro-soldering or PCB diagnostics. It’s one thing to replace a hard drive or clean a fan (more mechanical tasks); it’s entirely another to desolder and solder tiny electrical components on a printed circuit board. Console motherboards are packed with minuscule parts – one slip of a soldering iron or a tiny bit of static electricity shock can cause more damage. Without experience, you risk turning a repairable issue into a non-repairable one.
Common pitfalls of DIY electronics repair include:
Lack of proper tools: Fixing a blown component might require a fine-tipped temperature-controlled soldering iron, hot air rework station, flux, solder wick, microscope or magnifier, etc. Using inadequate tools can make things worse (for instance, overheating the board and lifting pads/traces).
Diagnosing the wrong thing: Let’s say you spot a bulging capacitor. Replacing it might seem to be the fix, but what if a MOSFET down the line is actually shorted and caused that cap to blow? If you only fix the cap, it might blow again or still not power on. Diagnosing electronics is like detective work – the obvious damaged part might not be the root cause. Professionals use schematics and systematic testing to find all failed parts.
Risk of electric shock: If you’re digging into the power supply unit (PSU), remember that PSUs connect to mains voltage. Big capacitors in a PSU can hold a charge even after unplugging – touching the wrong part could give you a nasty shock. There’s also risk of shorting something and causing sparks or further damage if you don’t know proper safety.
Voiding warranty or causing irreparable harm: Opening your console will usually void any remaining warranty. And if you accidentally damage the motherboard (say, scratch a trace or fry a chip due to static discharge), you might turn a salvageable console into an expensive paperweight. It’s heartbreaking, but we see it often – DIY attempts that end up doing more harm than good.
So, if you’re not already confident with electronics repair, the best step is to seek professional help instead of diving in over your head. You wouldn’t try to perform surgery after watching a couple of YouTube videos, right? Think of micro-soldering and component-level console repair as surgery on your beloved gaming system. It requires skill, practice, and the right equipment.
How Professionals Diagnose and Repair a Surge-Damaged Console
Professional repair technicians (like the team at OneUpFix 😉) deal with power-damaged consoles all the time. To them, a console that won’t turn on after a surge isn’t a mysterious brick – it’s a puzzle that can be solved with the right approach. Here’s what skilled console repair pros bring to the table:
Expert Diagnostics: A repair pro will systematically test your console’s power circuitry. They often start with the power supply – using tools to check if the PSU (internal or external) is outputting the correct voltages. If your console’s power supply itself is dead due to the surge, they can confirm that quickly. Assuming the PSU is fine, they’ll move to the motherboard. Using a multimeter, they’ll check fuses for continuity, test various voltage rails (5V standby, 12V, 3.3V, etc., depending on console) to see where the power stops flowing. They might inject a small voltage to test for shorts or use thermal cameras to spot hot components that shouldn’t be getting hot (a neat trick to find shorted chips). In short, they have a diagnostic process to isolate the faulty component or area.
Specialized Tools: Professional technicians use equipment specifically designed for electronics repair. For instance, if a capacitor or MOSFET needs replacement, they’ll use hot air rework stations and precision soldering irons to remove the bad part and solder on a new one without damaging the surrounding components. They often have bench power supplies to safely power parts of the console during testing, and oscilloscopes or logic analyzers to observe signals if needed. If a tiny power management IC is bad, they have the means to replace that chip (which could have dozens of pins closer together than the width of a pinhead!). Basically, what’s nearly impossible for an untrained person becomes routine with the right gear and experience.
Access to Parts and Schematics: Console repair specialists often have access to replacement parts – whether harvested from donor boards or ordered from suppliers. If your console blew a common component (say, an APU fuse in a PS5 or a certain MOSFET in an Xbox), chances are a pro might have that part on hand or knows exactly where to get it. They also reference schematics or board diagrams when available, which are like blueprints for the console’s circuitry. This helps them trace problems and ensure nothing is missed. For example, if a surge came through the HDMI port (yes, that can happen via a TV during a lightning strike), a tech would know to also check the HDMI IC for damage. The average person wouldn’t even think of that.
Experience with Similar Cases: Perhaps most importantly, professionals have the experience of seeing many dead consoles and recognizing patterns. They might recall “Ah, I’ve seen a surge-killed PS4 before – it was a blown standby regulator” or “This sounds like the same symptoms as that Xbox Series X we fixed last month.” This knowledge means they can zoom in on the issue faster and know the likely fix. It’s like having a cheat sheet for the “boss fight” that is console repair.
Testing and Safety: After fixing the hardware issue, professionals will thoroughly test your console to ensure it’s truly fixed and stable. They won’t just swap a part and call it a day; they’ll power it on, maybe run it for a while, and ensure that no other damage exists. This quality control means when you get your console back, it’s actually reliable. And if multiple parts were damaged, they’ll catch that during the diagnostic phase (for instance, replacing a blown fuse only to have it blow again because a MOSFET is still shorted – a pro finds and fixes both before returning your console).
In summary, professional repair is often the safest and most effective route when dealing with surge damage. While it does cost money, remember that you’re paying not just for a part but for the expertise and labor to bring your console back from the dead. For serious gamers dedicated to keeping their custom console or high-end setup running, that investment is well worth it. After all, it’s usually far cheaper than buying a brand-new console, especially in the middle of a console generation when prices are high and stock might be limited.
Next Steps: Protect Your Console and Plan for Repair
Now that you have a clear picture of the situation, let’s outline what to do next after you’ve identified (or strongly suspect) surge damage:
Keep It Unplugged: If your console is still lifeless after all the basic checks, leave it unplugged until it can be repaired. This prevents any further electrical stress. It’s tempting to keep trying the power button in hopes it magically works, but if there’s an internal short, every attempt could be pushing more current into a damaged part. For safety (and to avoid worsening the damage), don’t run power through the console in its faulty state.
Avoid Quick “Hack” Fixes: You might come across internet tips like “press this secret reset button” or “put your console in rice” (yes, people try that after floods/power issues) – most of these are myths. There is no software reset for hardware damage. Also, do NOT attempt risky tricks like wrapping the console in blankets to heat it up (an infamous fake fix for other issues) or bridging a blown fuse with foil. Bypassing protections can lead to serious damage or fire. If you think an internal fuse is blown, that happened for a reason – bridging it without fixing the cause is dangerous.
Document What Happened: Jot down a quick note of what occurred around the time of the surge. Was there a lightning storm? Did other electronics fail? Did you smell something or hear a pop? Did any lights come on at all? This info can be really helpful to a repair technician and can also help you with any insurance claim if you have coverage for electronics (some home insurance or surge protector warranties cover surge damage – check your policies). Having details will make it easier to diagnose and possibly prove the surge event for claims.
Plan for Repairs: At this stage, if you’re not an electronics whiz, it’s time to reach out to a professional console repair service. You’ll want to choose a reputable repair shop experienced in motherboard-level console repairs (not all gadget repair shops handle consoles or component repair, but those like OneUpFix specialize in it). Many offer a diagnostic service where you send in or drop off the console, they figure out what’s wrong, and then contact you with a repair quote. Take advantage of that — it will let you know for sure what failed and how much it will cost to fix.
Don’t DIY if You’re Unsure: As we stressed earlier, resist the urge to open the console yourself if you’re not confident in doing so. There’s nothing user-serviceable inside a console power circuit (aside from maybe an easily swappable internal PSU in some models). It’s not like replacing a battery or adding RAM on a PC. The risk of causing more harm is real. It’s perfectly fine to admit this is beyond your skillset — that’s what professionals are for! Your job as a gamer is to enjoy the games; our job as repair techs is to make sure your gear works.
Surge Protection Going Forward: Once you get through this incident, consider upgrading your surge protection for the future. Sometimes even a decent surge protector can’t handle a big surge (especially a lightning strike), but using a high-quality surge protector or an Uninterruptible Power Supply (UPS) with surge filtering can add extra safeguards. It’s also wise to unplug your console during severe lightning storms if possible, as no protector is 100% foolproof against a direct hit. Think of this as a learning experience to better shield your tech. That said, don’t feel too bad – sometimes, surges strike out of nowhere and we all get caught off guard.
By following these steps, you’ll be doing everything you can in the aftermath of a surge. You’ve checked the simple stuff, you’ve avoided making things worse, and you’re prepared to get it fixed properly. This proactive approach will save you time, money, and heartache in the long run.
Console Power Surge Repair: Get Back to Gaming with OneUpFix
At OneUpFix, we understand how important your console is to you. You’re not just another repair ticket — you’re a gamer who wants to get back to your virtual worlds as soon as possible. If a power surge has put your Xbox, PlayStation, or Nintendo console out of commission, don’t give up on it! Often, these consoles can be brought back to life with the right expertise and tools.
Why choose OneUpFix for your console power surge repair? For starters, we’ve got extensive experience with all major gaming systems and the typical issues they face. Our technicians have seen everything from an Xbox that took a lightning hit through the Ethernet cable, to a PS5 with a fried power IC, to a Nintendo Switch that wouldn’t charge after a power outage. We’ve successfully repaired them and sent the owners happily back to gaming. We take a motherboard-level approach — meaning we fix the actual components rather than just telling you to buy a new console. That’s usually faster and cheaper for you.
When you bring or send your console to OneUpFix, we’ll perform a thorough diagnostic and give you a clear explanation of what’s wrong. Maybe it’s as simple as swapping out an internal power supply module, or maybe it’s replacing a handful of burnt components on the board. In any case, you’ll get a transparent quote and the confidence that your device is being handled by people who treat it like their own.
Ready to get your console fixed? Reach out to us at OneUpFix.com – we’re here to help. Our team is happy to answer any questions, provide a repair estimate, or even just talk you through the situation if you’re not sure what to do. We know you’re eager to hit that power button and see your console spring back to life. With our professional repair services, that moment is closer than you think.
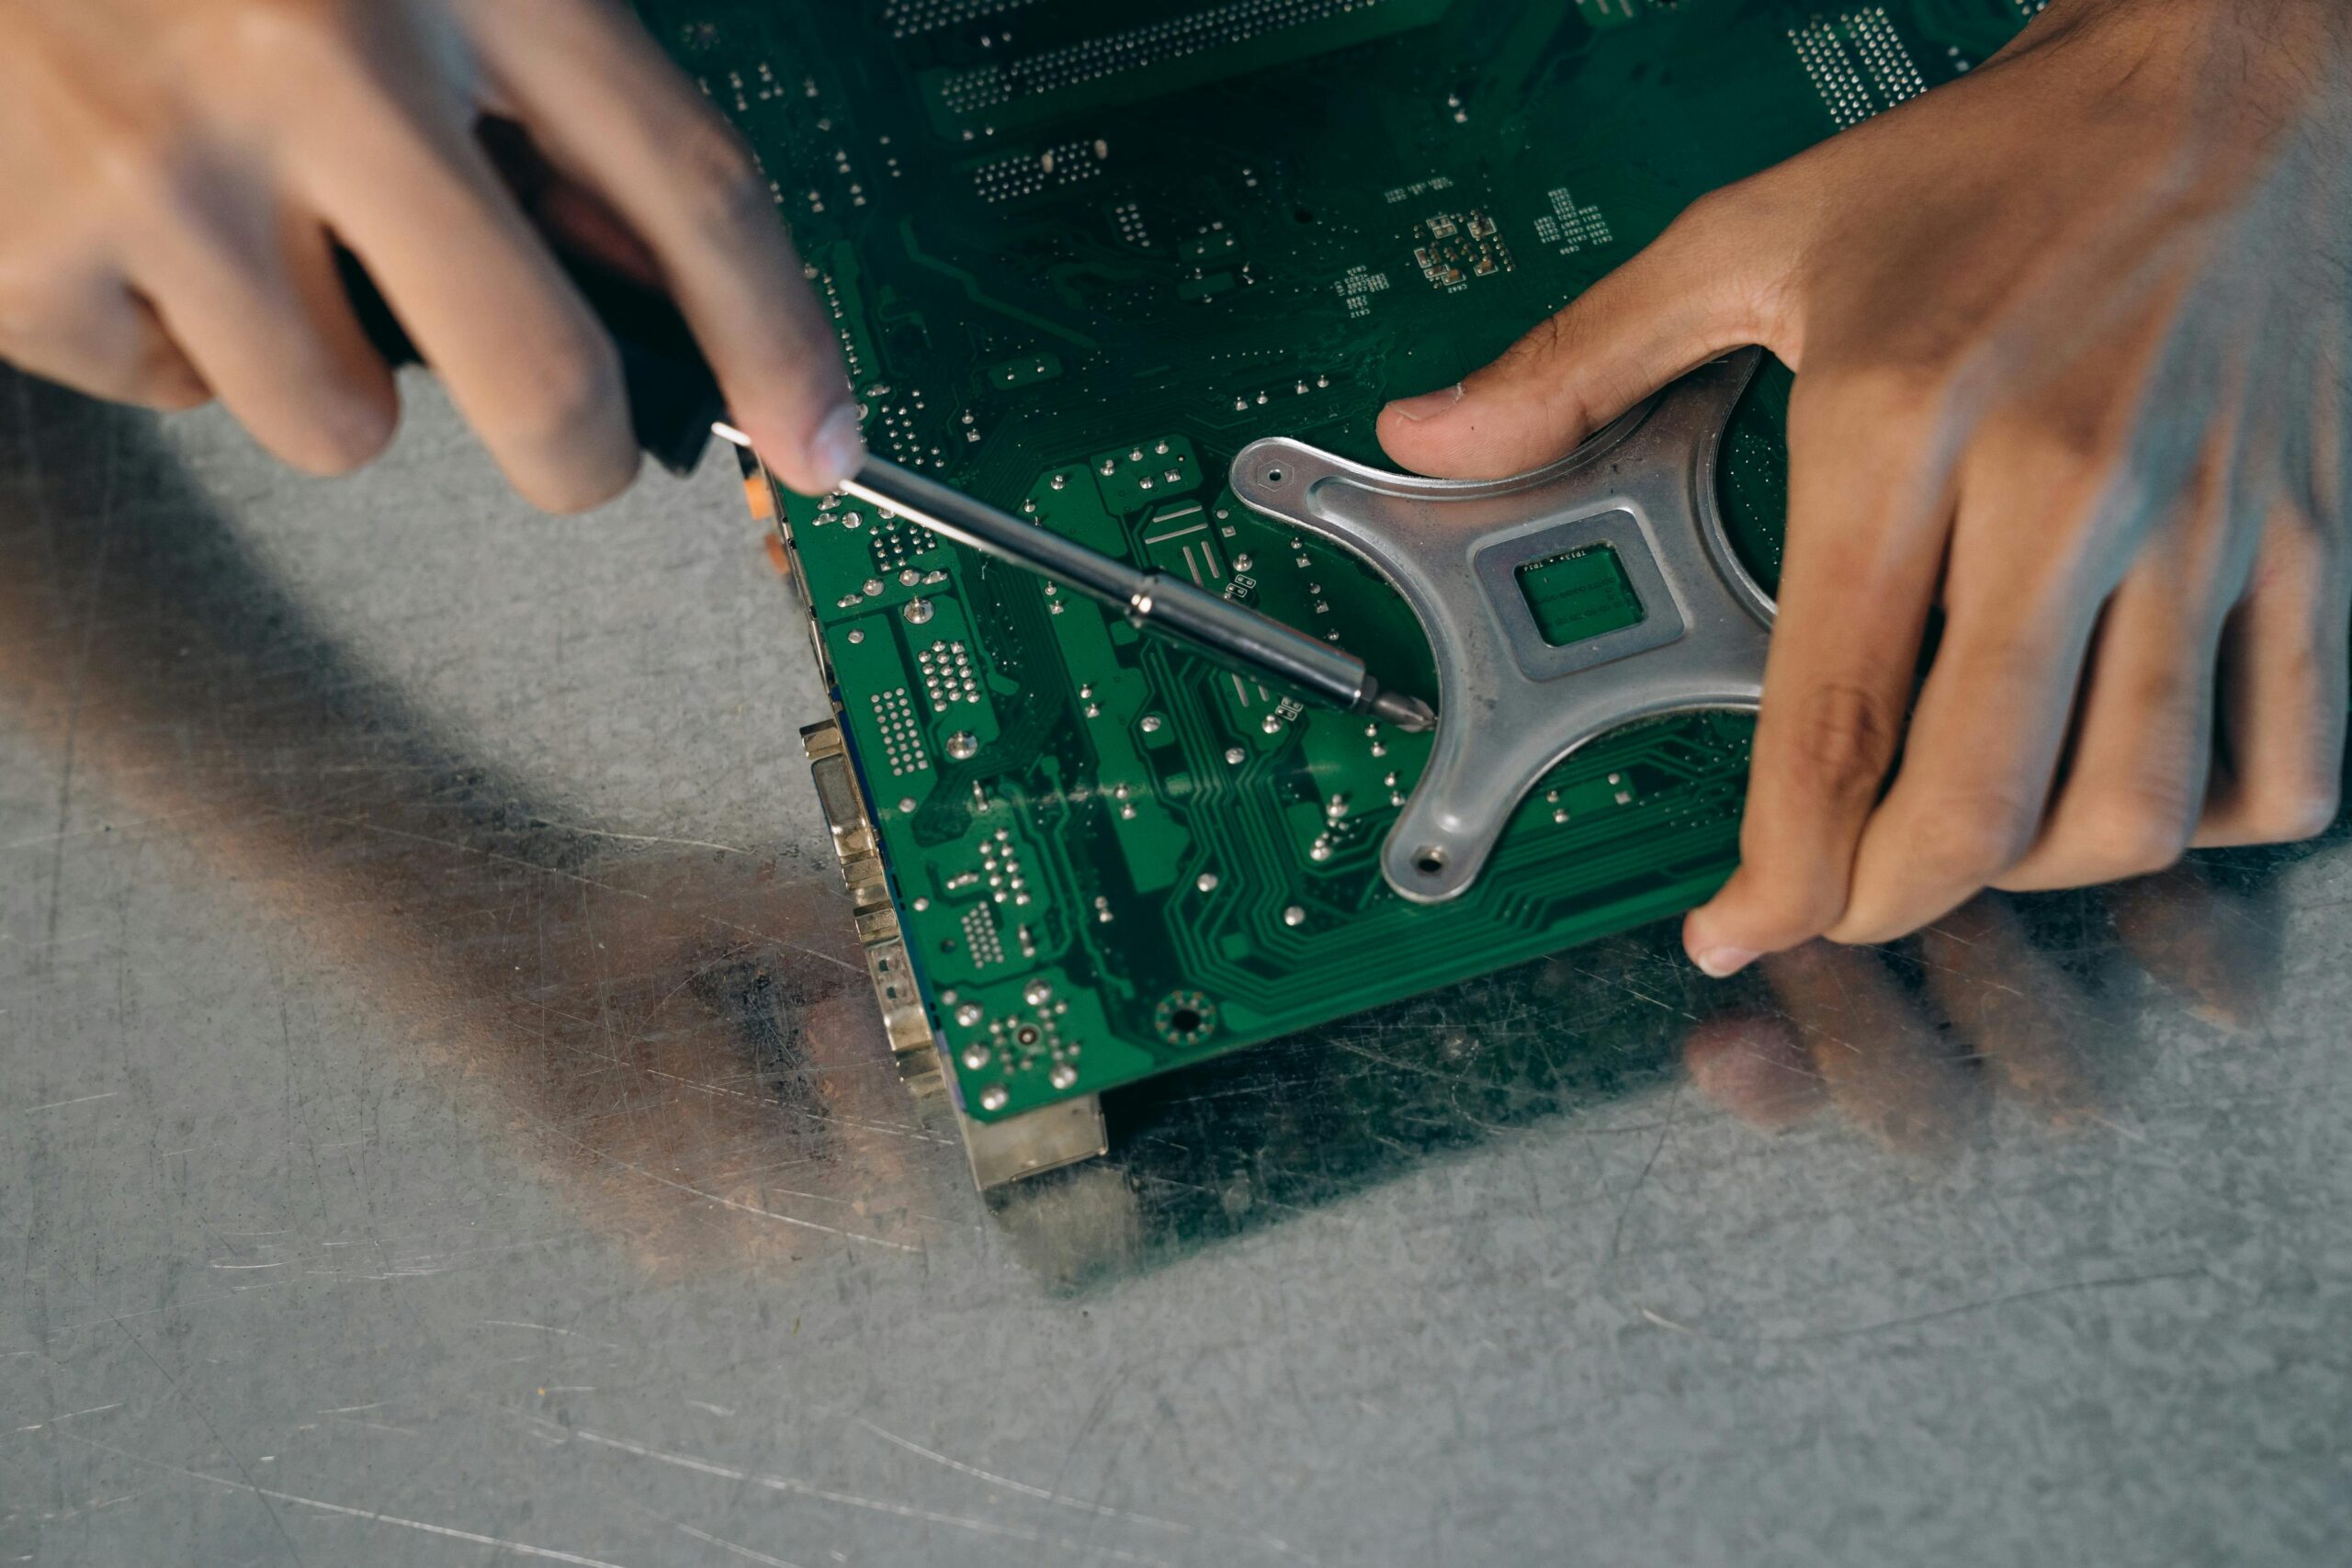
(Image: An electronics repair technician carefully soldering components on a game console motherboard – the kind of delicate work best left to the pros.)
Don’t Let a Surge Be “Game Over”
A power surge might feel like the final boss that came out of nowhere and wiped out your save point. But with the right steps (and possibly a little help from experts), you can overcome this challenge. Use the checklist to cover your bases, stay safe by avoiding risky DIY fixes, and know that the OneUpFix team has your back for the heavy repairs.
Don’t let a power surge mark the end of your console’s life. Consider it a side quest that you and OneUpFix can tackle together. We’ll help you get your favorite gaming machine up and running again, so you can get back to doing what you love most — gaming, uninterrupted and stress-free.
If you need console surge damage repair, contact OneUpFix today. We’ll turn that moment of panic into a victory screen, and you’ll be back online, stronger than ever. Game on!